
Upload Contribution Confirmations for the Annual Administration – Valuation Report
Thank you for selecting TRA as your Third Party Administrator (TPA). We appreciate your trust and partnership. To assist you in completing the Valuation Report, we have prepared a brief and user-friendly tutorial. We kindly ask you to upload your contribution confirmations, as this will ensure accurate and comprehensive reporting. By providing this essential information, you play a crucial role in the success of our annual valuation process. Your contributions will enable us to conduct a thorough analysis and assessment of your organization’s status. We value your cooperation and look forward to delivering valuable insights for your benefit.
Phases of the Process
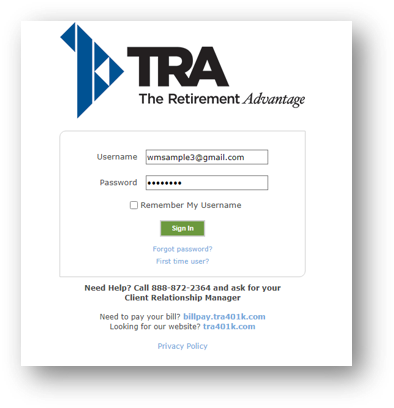
Access the Plan Sponsor Link
Visit our secure website, PlanSponsorLink
- Here you will log in using the email address we have on file for you
- If you have forgot your password, click “Forgot Password” and follow those prompts
- If you have never logged in, click “First Time User” and follow those prompts
- Still having trouble logging in? Please contact your TRA Client Relationship Manager
- Once you have your credentials in, click “Sign In”
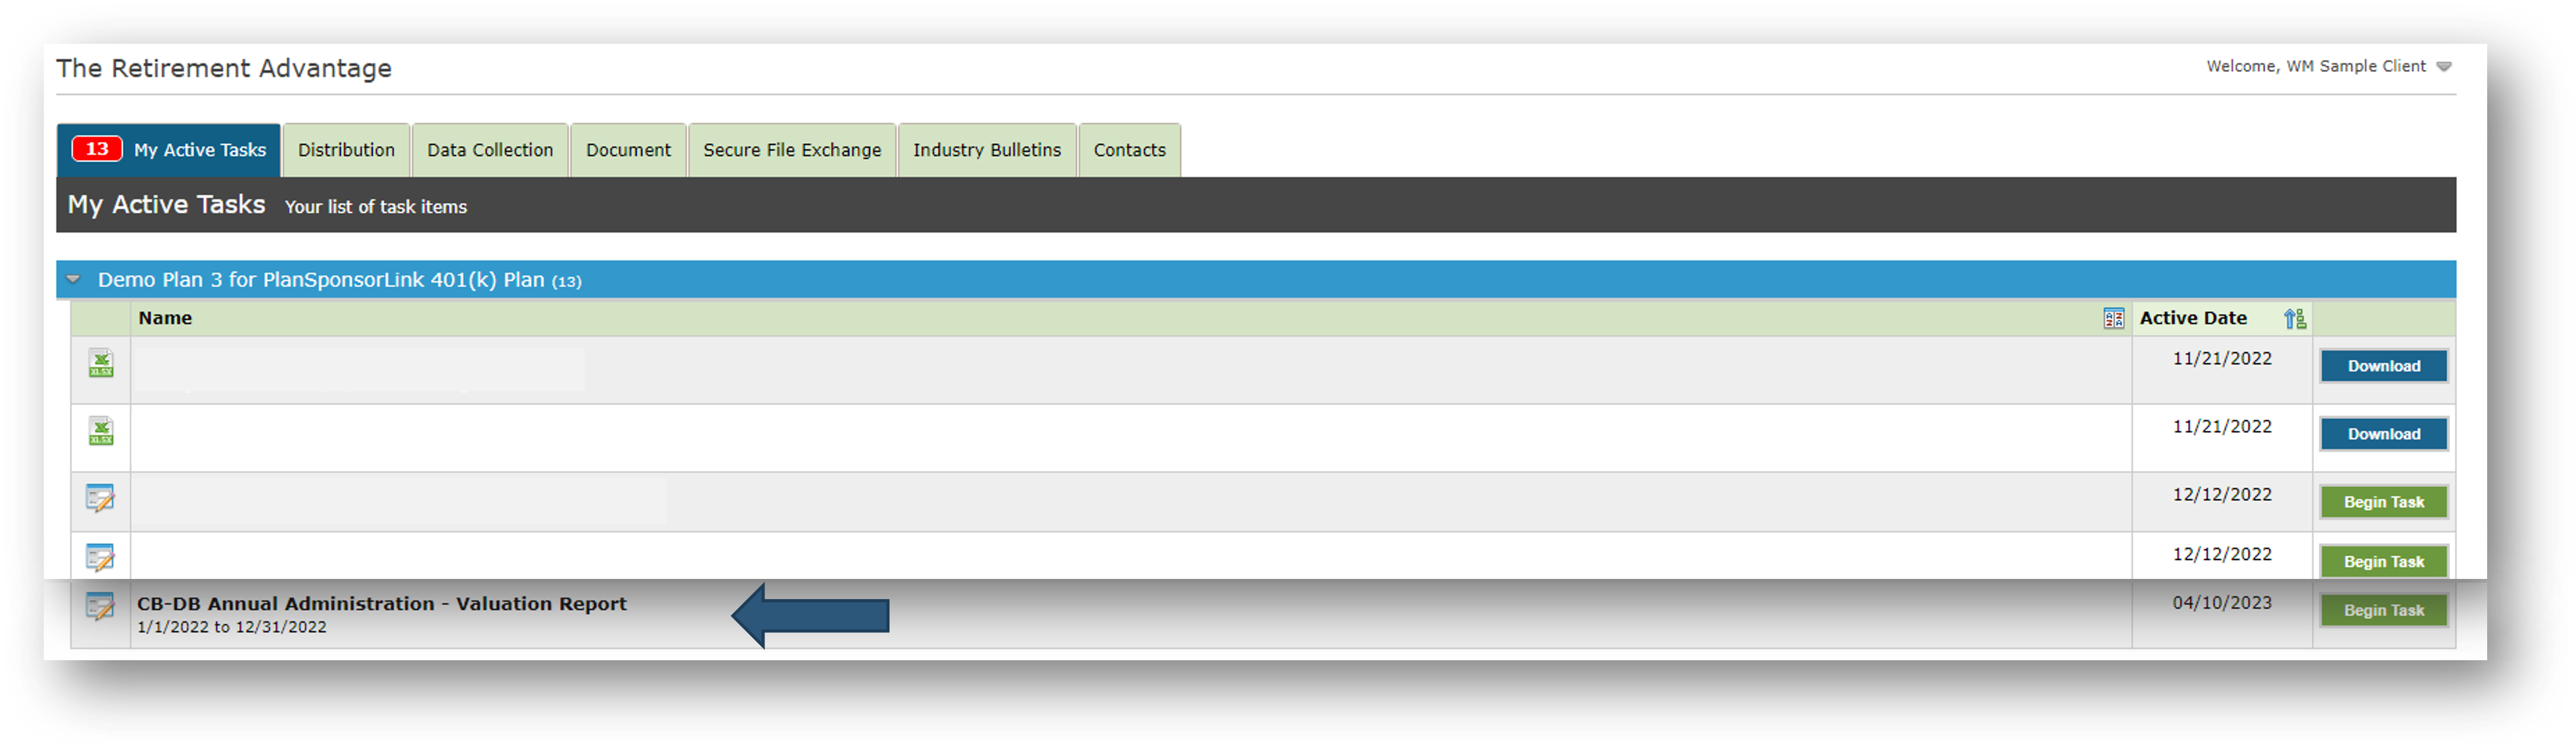
Your Task: CB-DB Annual Administration – Valuation Report
Once logged in, you will see your “My Active Tasks”
- Locate the “CB-DB Annual Administration – Valuation Report” Task
- Click the green “Begin Task” button
Data Collection: Three Steps
- Please read through the instructions on the screen.
- If you have any questions throughout the process, please contact your TRA Client Relationship Manager
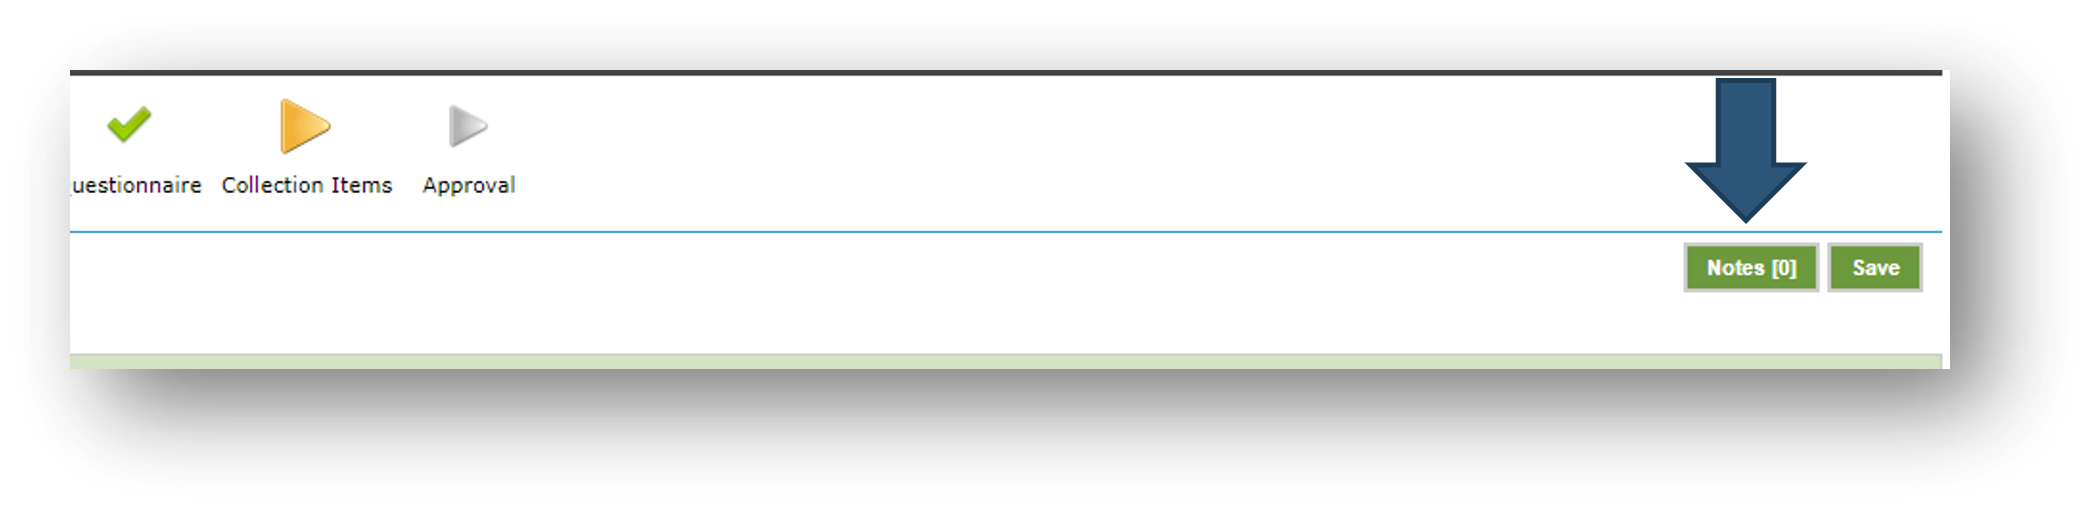
- Click the green “Notes” button on the top right to add notes for TRA
- For more information on adding notes, please refer to the “Adding Notes” slide
- Once you have understood the instructions, click into the field boxes to type in your answers
- The “amount” fields should be in the form of “XXXXX.XX”
- The “date” fields should be in the form of “MM/DD/YYYY”
- You can also select the date by clicking on the calendar icon
- The fields with a red asterisk are mandatory. Enter each date and deposit amount in each separate field.
IMPORTANT: Enter the date of each deposit and deposited amount in the fields provided. Please be sure to review these deposits, as you are certifying that these deposits are to be reported for the 2022 plan year. Please be sure that all the deposits listed total the amount that will be deducted on your 2022 corporate tax return.
Step 1: Information
Example:
- If you deposited 4 contributions, you would input it as follows:

Step 2: Proof of Deposits
- Click the green “Add” button to upload your proof of deposits.

- This will create a pop-up to attach files from your computer and apply it to the Annual Valuation Report task
- To Attach the proofs:
- You can drag and drop the file from your computer
- You can click the white “Select File” button, which will open a folder pop-up, to find the file where you saved it in your computer files
- If you do not know where you saved the file, please re-download it from your financial provider to your “Desktop”. Then, on the Plan Sponsor Link, click “Select File” and select “Desktop” from the folder pop-up
- Once attached, click the white box to apply it to the “Proof of Deposit (deposit #xx)”
- Please ensure that each proof coincides with the dates and amounts listed on the “Questionnaire” screen
- Click the green “Upload” button to save the file to the Plan Sponsor Link
- To not save the file, either click the gray “Cancel” button or the “X”
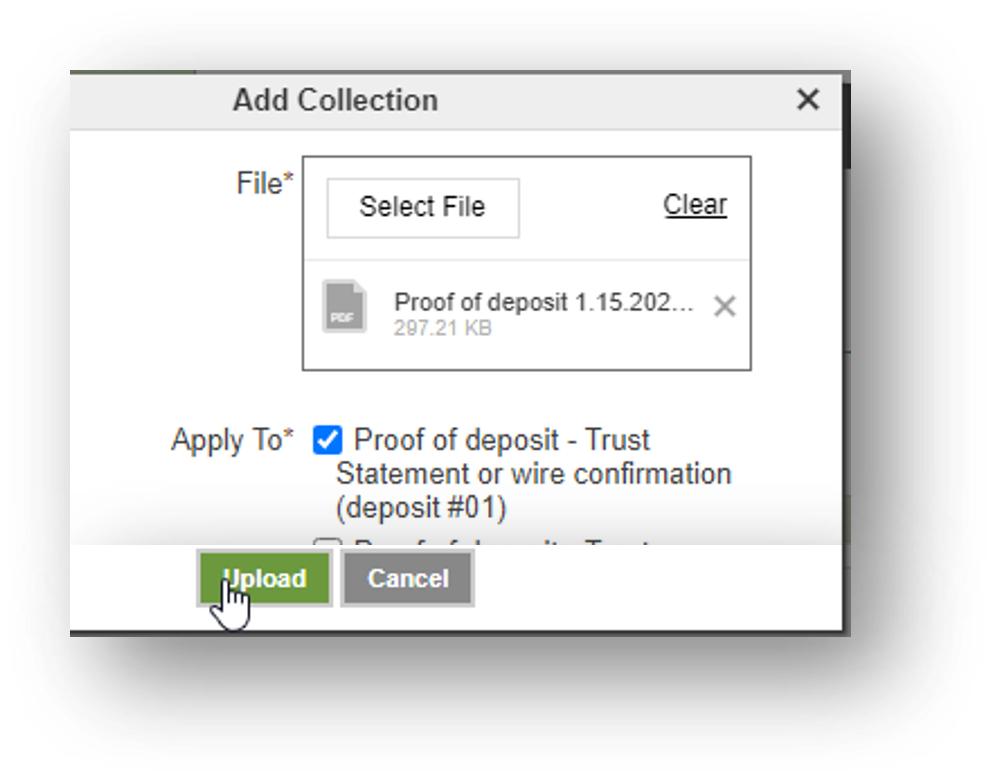
- You will need to add each proof separately
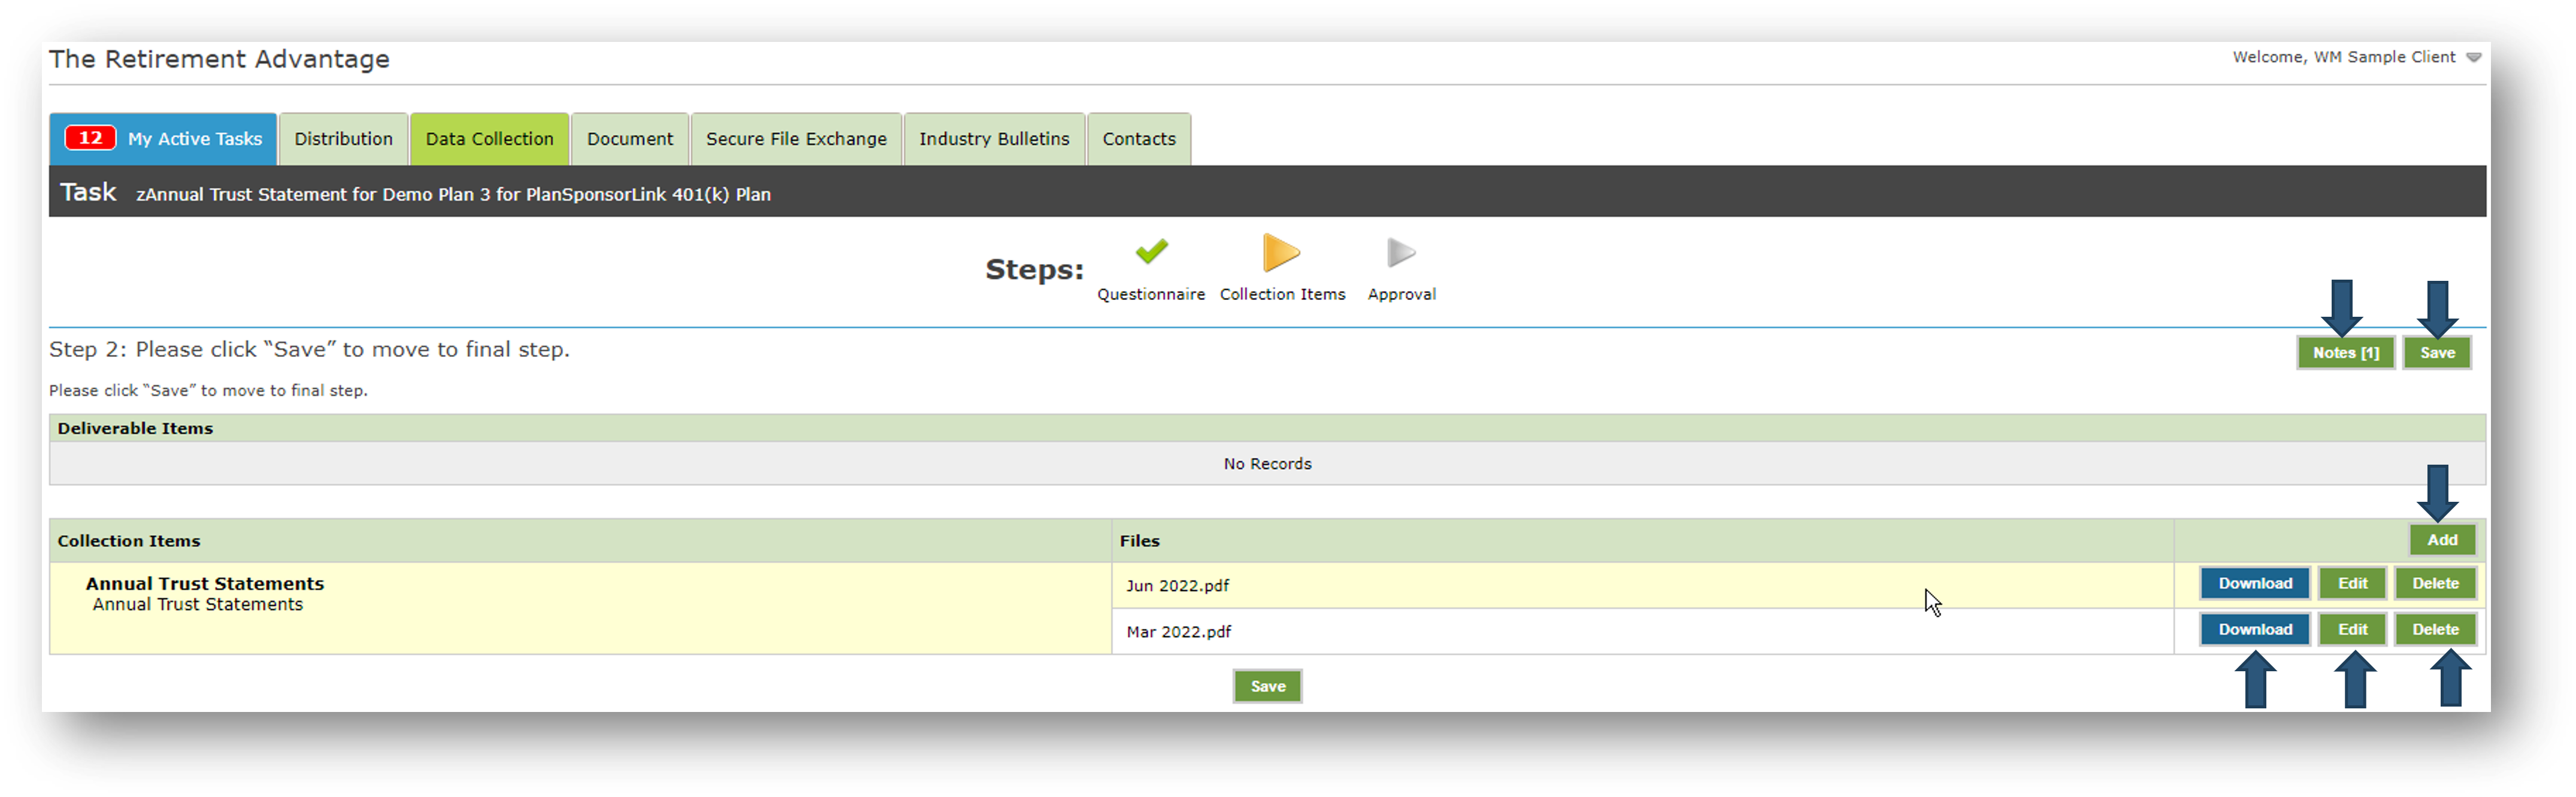
- Once you have downloaded all necessary trust statements for the year, you can review them under “Annual Valuation Report”
- From here, you can “Download”, “Edit”, or “Delete” each statement
- You can also “Add” more proofs if you have missed one
- Click the green “Notes” button on the top right to add notes for TRA
- For more information on adding notes, please refer to the “Adding Notes” slide
- Click the green “Save” button to move on to the last screen
- Once you have downloaded all necessary trust statements for the year, you can review them under “Annual Valuation Report”
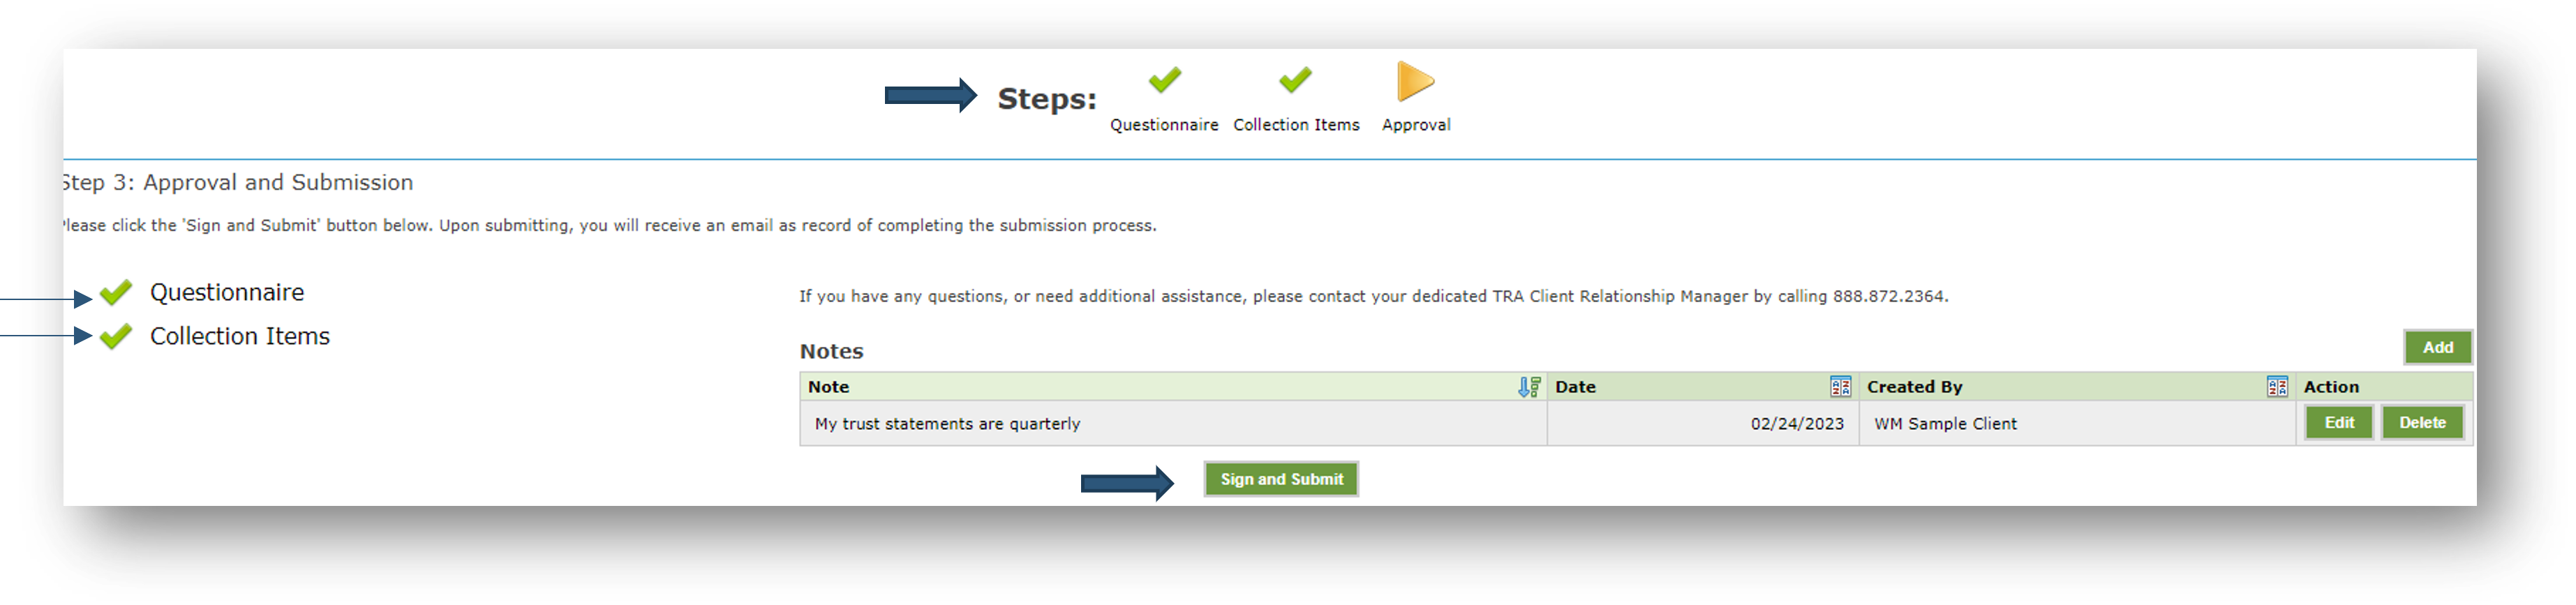
Step 3: Approval and Submission
- Here, you can review any notes you or TRA added to the task
- You can also add more notes on this screen
- Also ensure that the 2 prior steps, “Questionnaire” and “Collection Items”, have a green checkmark next to them
- This means that you have completed the requirements for this task
- If there is red “X” next to either item, you can click on that “Step” on the top to review and “Save”, so that the step is complete
- Once everything is complete to the fullest, click the green “Sign and Submit” button to send it to TRA for our review
- If we have any questions, your Client Relationship Manager will contact you.
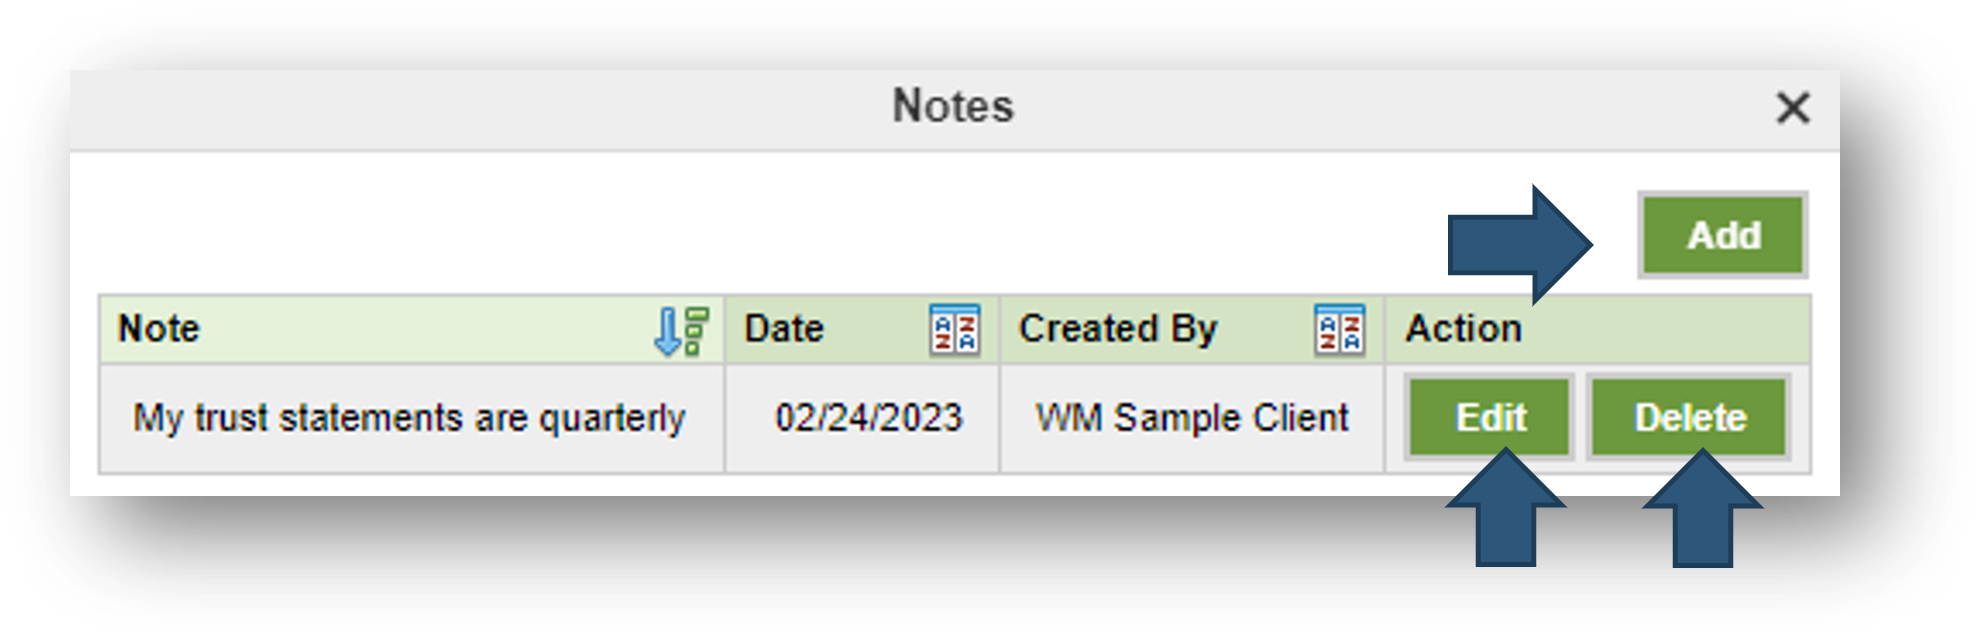
Adding Notes:
Notes” will be available to add on each step
- To add a note, click the green “Notes” button on the top right of the screen
- These notes will be available for our team to view as we work through your proof of deposits
- “Notes” should be used to communicate non-urgent information and any relevant descriptions regarding your proof of deposits.
- Please contact your TRA Client Relationship Manager if you have more urgent information or notes to share.
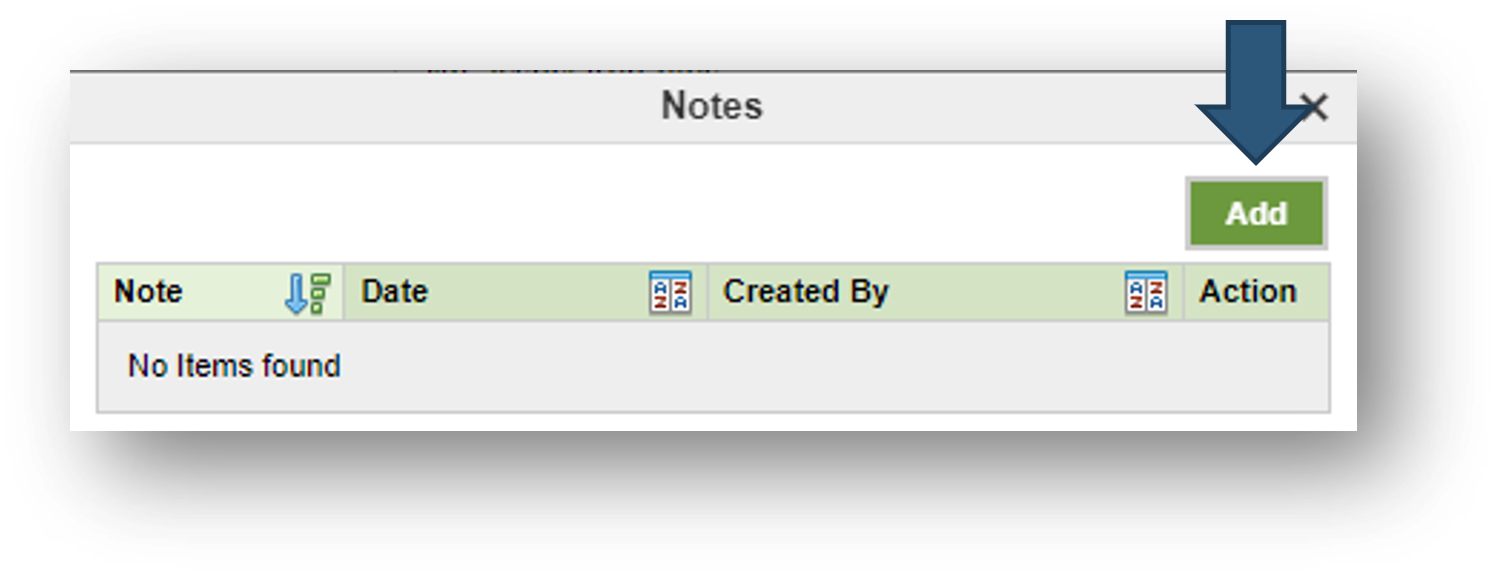
- This will create a pop-up that shows all notes in each step, for the “Questionnaire” or “Collection Items” steps
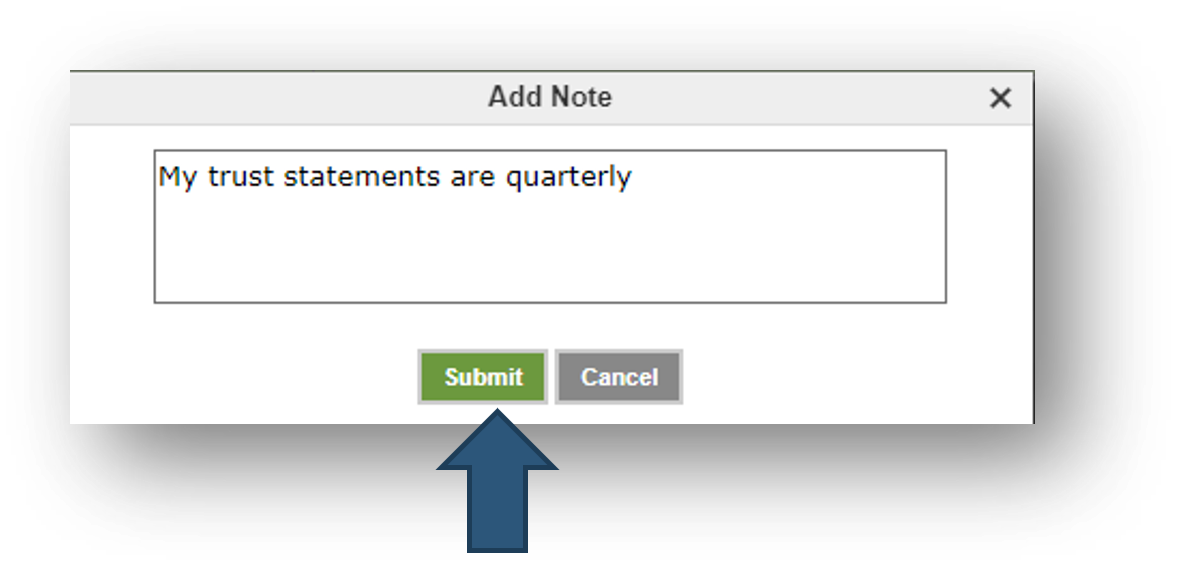
- Click the green “Add” button to be able to type any notes in. Click the green “Submit” button to save the note or the gray “Cancel” button to not save your note.
- Once the note is added, you can either “Edit” or “Delete” the note.
- Click the “X” to exit the note screens once you are finished with adding notes
Your CRM is here to assist you with any questions you may have as you complete the Year-End Data Collection Questionnaire or Employee Census. Contact TRA today if you need any assistance.