
Ready to start a request?
Distribution PortalPortal (Video) Instructions
Participant Distribution Portal
Plan Sponsor Distribution Portal
Plan Sponsor Portal Instructions
Logging in for the first time:
When you have been invited to the portal, you will receive an invitation similar to the image below inviting you to the web portal. Simply click the provided URL and enter your Login Name and temporary password. Once you have logged in, you will be asked to create three security questions and reset your password.

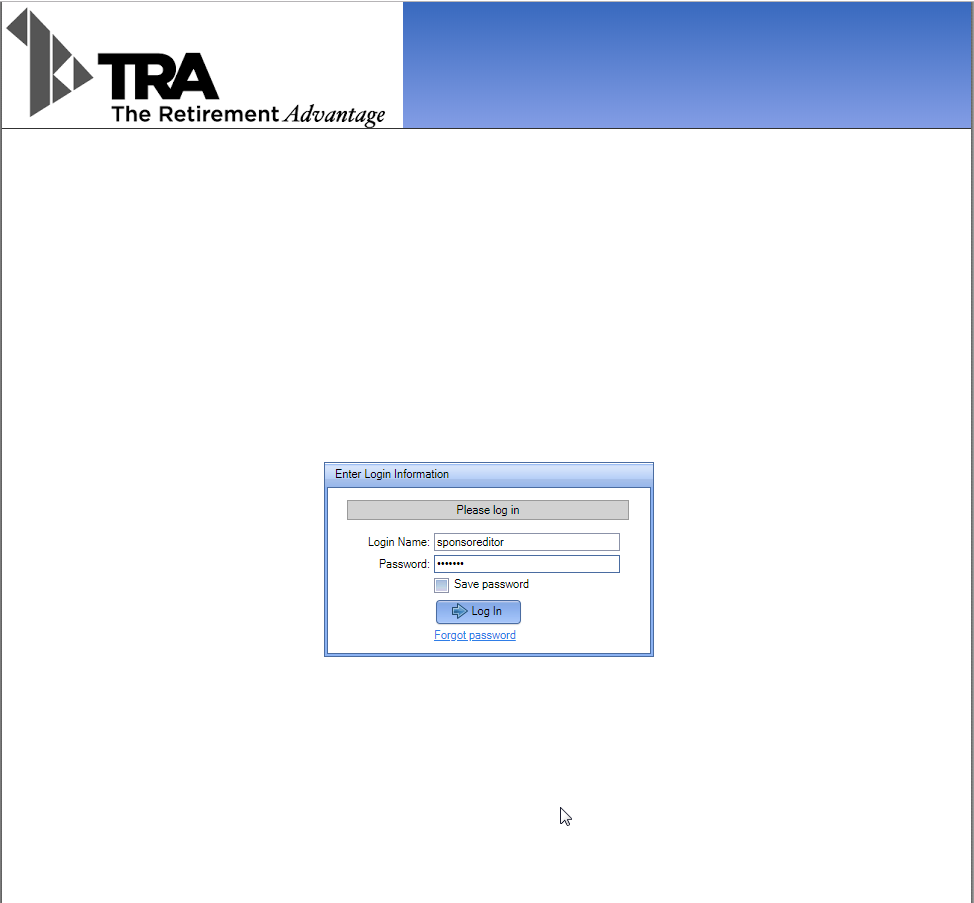
The image below is the login page for the portal. We recommend that you save this page to your favorites for quicker access. If you have forgotten your password, click the ‘Forgot password’ link and answer the three security questions you created in order to reset your password.
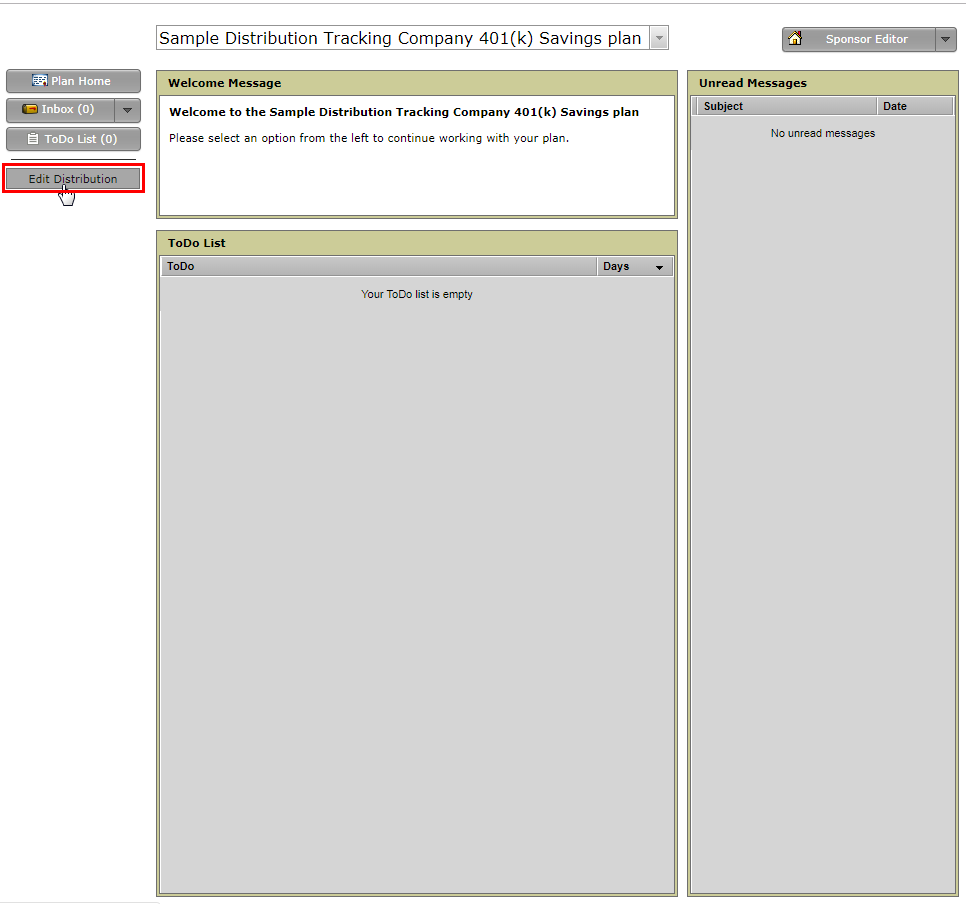
Once you are logged in, click the Edit Distributions button in the upper left corner of the page to be re-directed to the Distributions Dashboard.
Using the Distribution Portal:
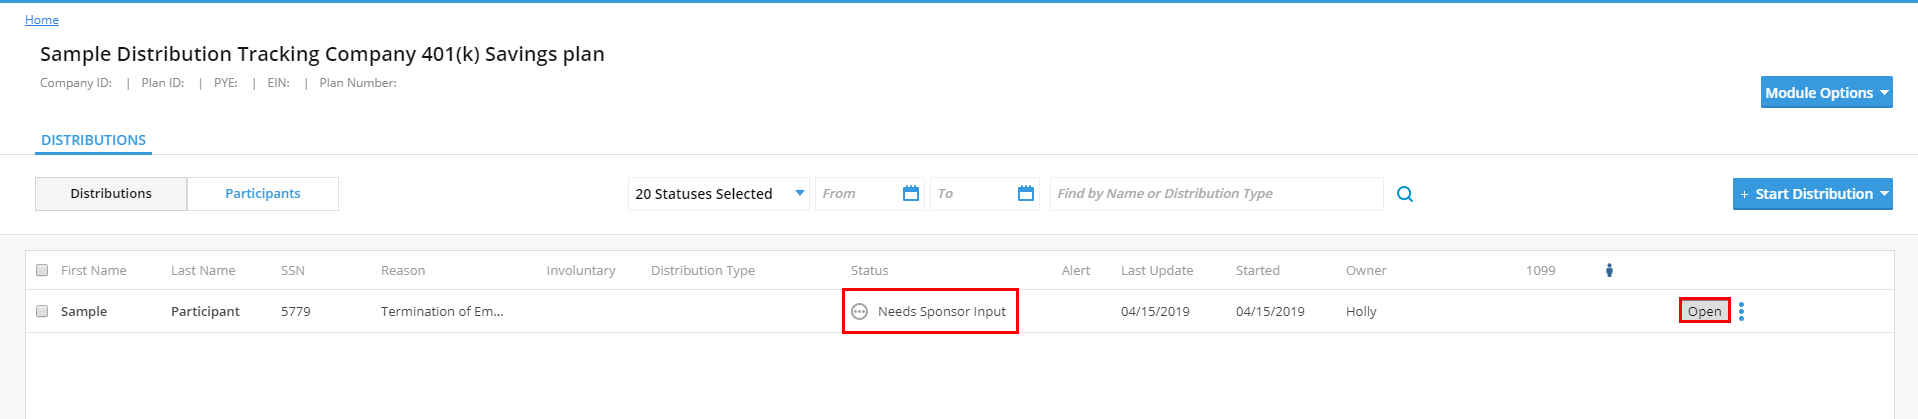
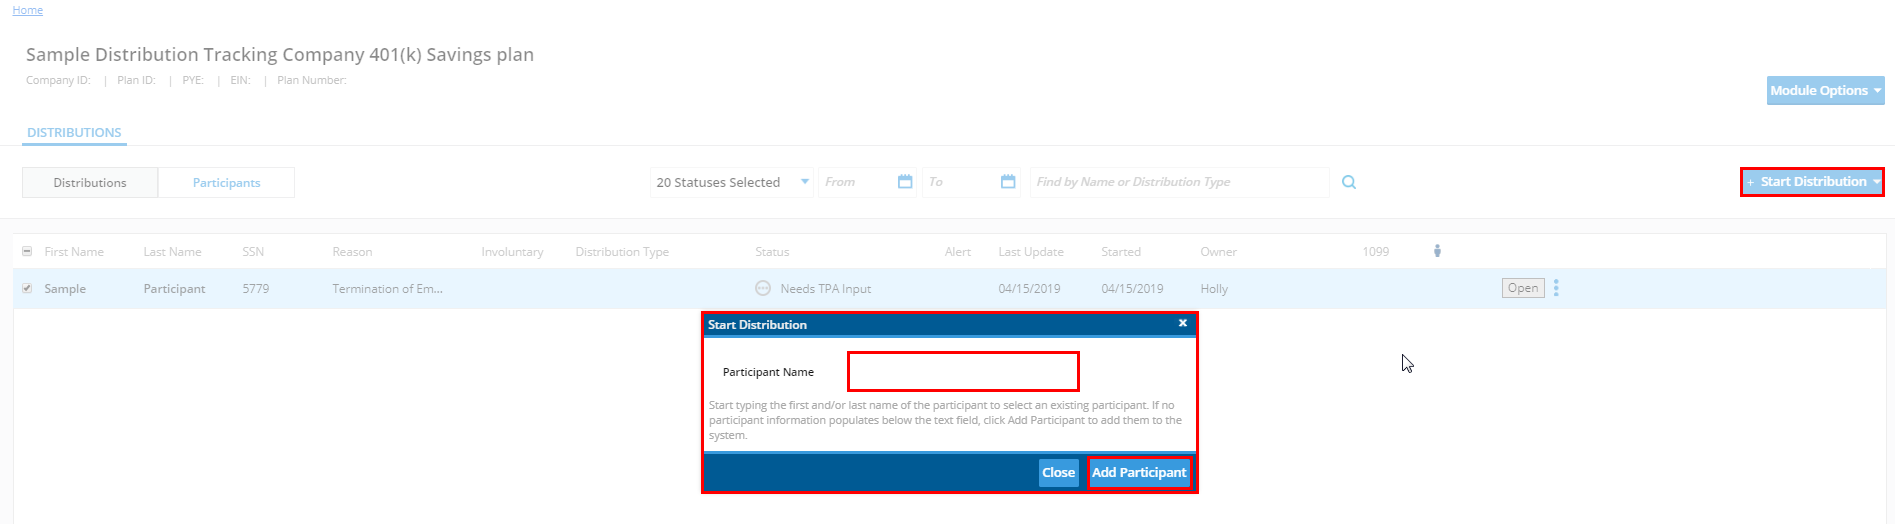
Now that you have arrived on the Distribution Dashboard, you will see a list of all distributions in progress for your plan. You may access the details by clicking the ‘Open’ button on the right. Please note that if the distributions status isn’t ‘Needs Sponsor Input’, you will only be able to view the record. Only distributions that have a status of ‘Needs Sponsor Input’ will be editable.
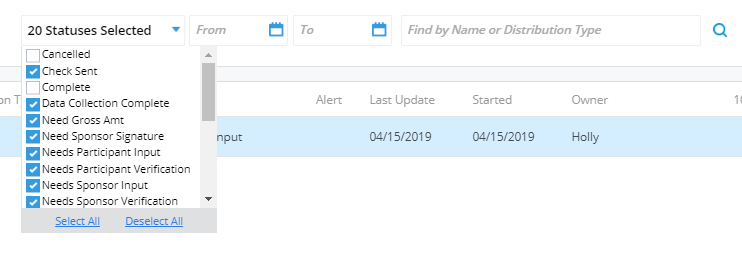
You can click on the column headers and apply the status, date range, and name or distribution type filter near the top of the page to sort through your distribution records.
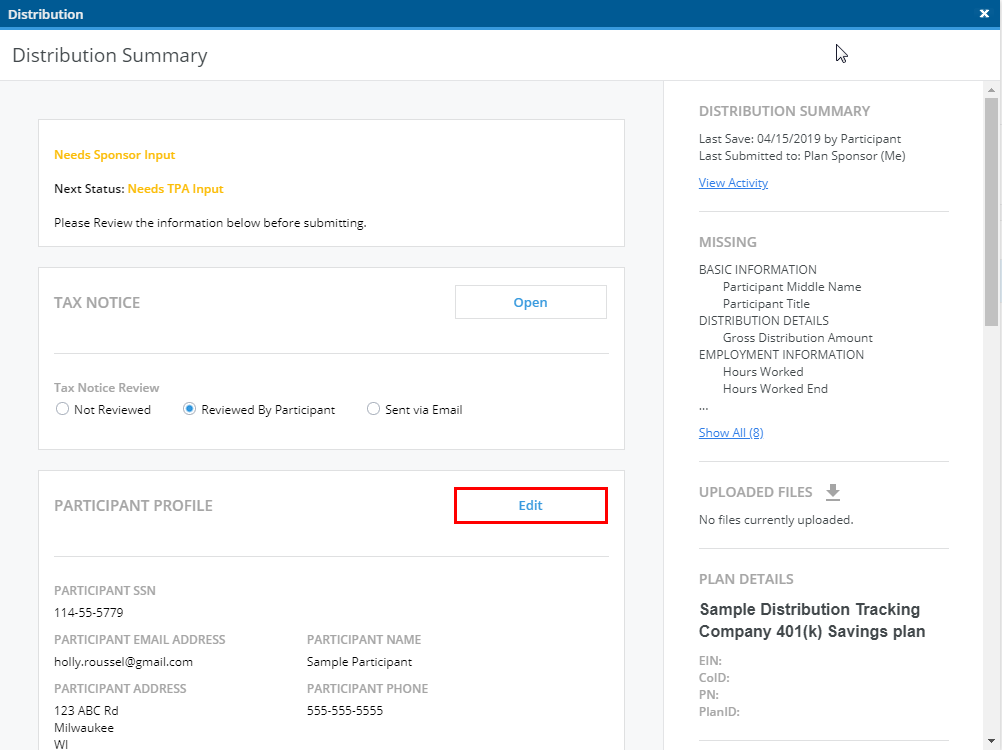
When you are ready to edit a record, click the ‘Open’ button and the page below will appear. On the left you can click the ‘Edit’ buttons to edit the corresponding data. On the right side of the page, you can view an activity log, missing information summary, any files you or the participant have uploaded, and your plan details.
Editing a Distribution
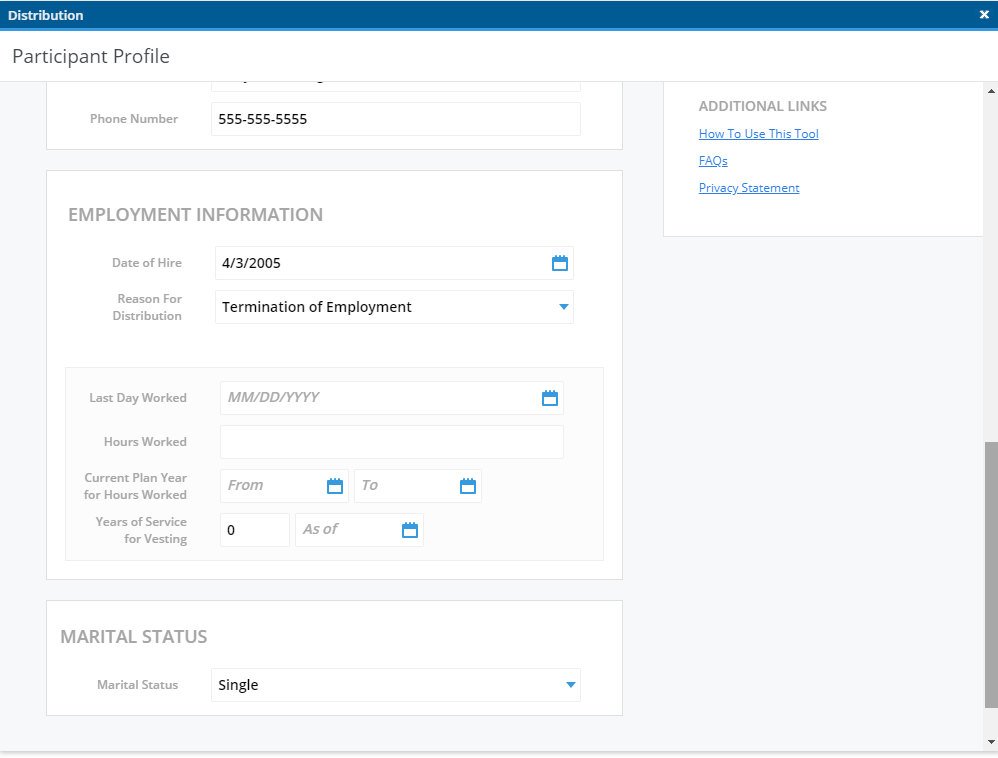
Once you click the ‘Edit’ button, the distribution record will open for editing. When you are done filling in the details, click the ‘Continue’ button in the bottom right.
On the next page, you will have the option to enter the distribution details on behalf of the participant. If this section is filled in or the participant has already done this, you may skip this step.
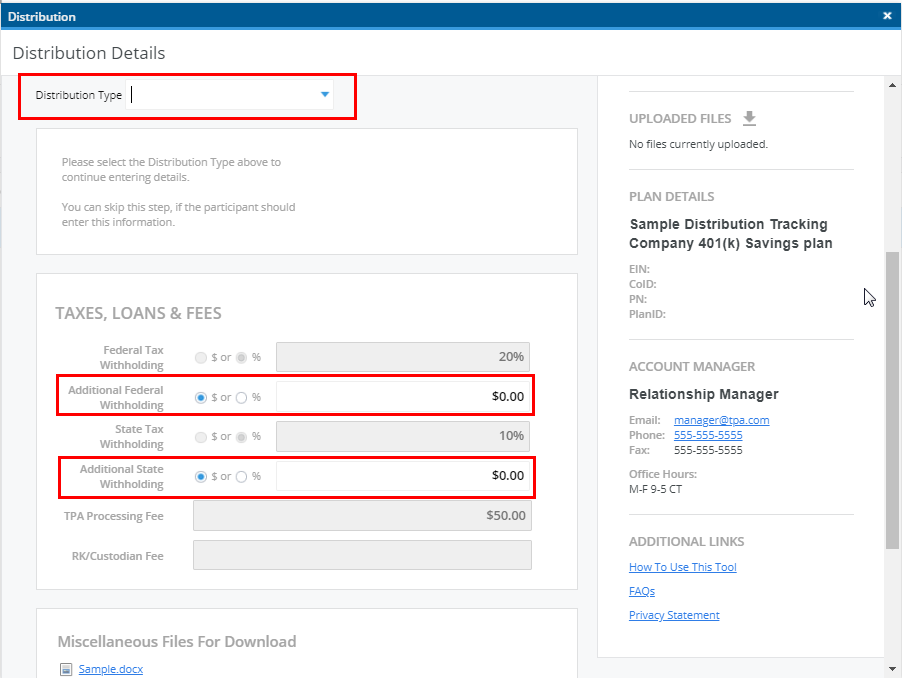
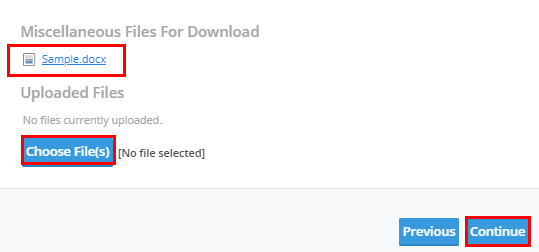
At the bottom of the page, you will find any documents the plan provider or participant has uploaded for you to download. You may access these files at any time by logging in, opening the distribution record, and clicking on the file.
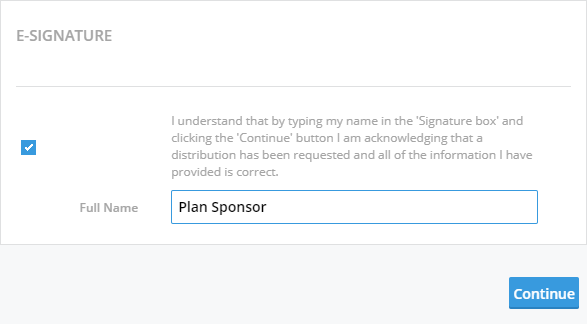
When you are done with data entry, the final step on the page will be to electronically sign-off on the request. Simply check the box and enter your name in the box provided. When finished, click the ‘Continue’ button.
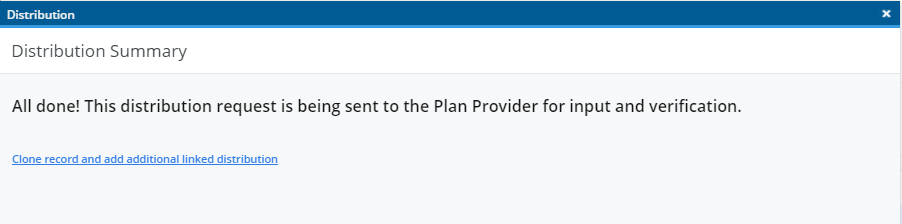
Once you are through the data collection process, you will receive a confirmation that the distribution has been sent back to your plan provider for review and processing.
Checking the Status:
You may log into the portal at any time to check on the status of a distribution, find out what information might be outstanding, or to request another distribution on behalf of the participant. You can check the ‘Status’ column on the dashboard or locate the ‘Status’ filter near the top of the page to filter by a particular status.

Initiating a Distribution:
If you will be initiating a distribution on behalf of your participant, click the ‘Start Distribution’ button and follow the prompts. You will first be asked to enter the name of the participant.
If your participant did not receive an invitation to the portal to fill in the distribution details, first check to see if the email address provided was correct. You may then re-invite your participant by clicking on the menu icon to the right of the ‘Open’ button and select ‘Send participant portal invitation’.

Please contact your dedicated CRM with any questions.

- Click Here To Contact Your CRM With Questions